After getting the pistons moving from their partially seized state, she’s got a belly full of fresh oil and a new filter after discovering there wasn’t any water in the engine as we first feared. Less positive was the state of the petrol tank which had succumbed to the long period of sitting outdoors and is now currently at our local bike shop who will ascertain what is required to get it back to a useable condition.
In the meantime we are going back to the shed to have a look at the air delivery system and see if we can clean that up a bit while we are waiting. Getting the right amount of clean air into the cylinder heads is another critical part of the bike running properly, so it makes sense to spend some time tidying it up.
Incase you missed it, check out:
Part one – We’ll show you how get a bike back to a rideable state on a limited budget
Part two – So you’ve removed the tank and managed free the pistons inside the bore, here’s our next instalment of getting an old or damaged bike going
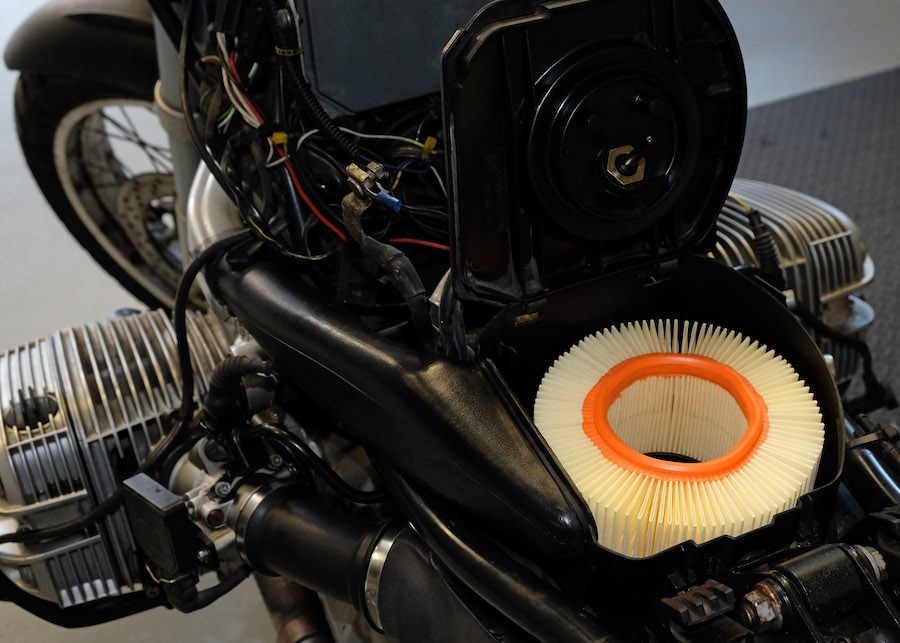
1 The air filter element is not looking pretty and it has been sitting in this condition for a while so we won’t bother trying to clean it, best to just buy a new one as they are not overly expensive.
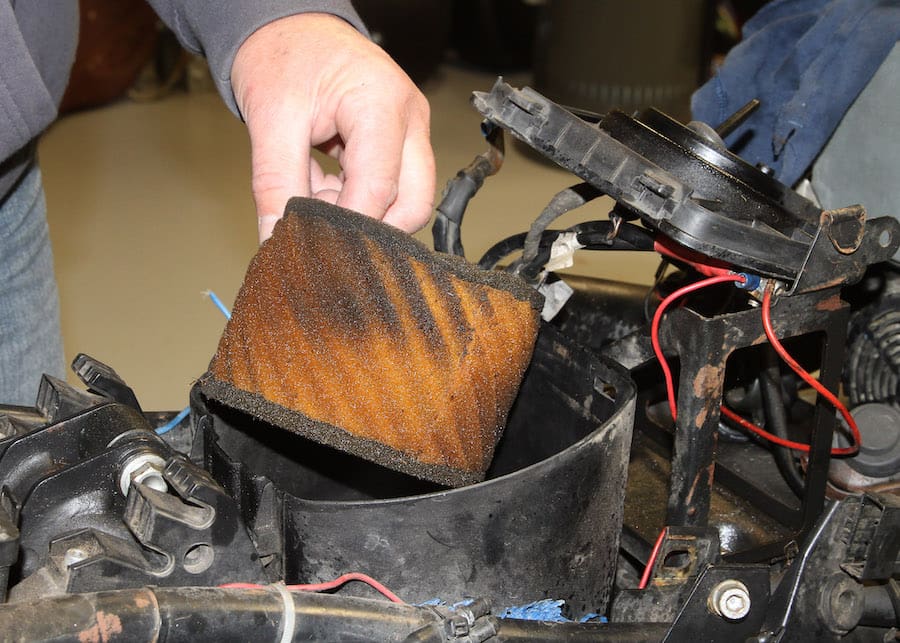
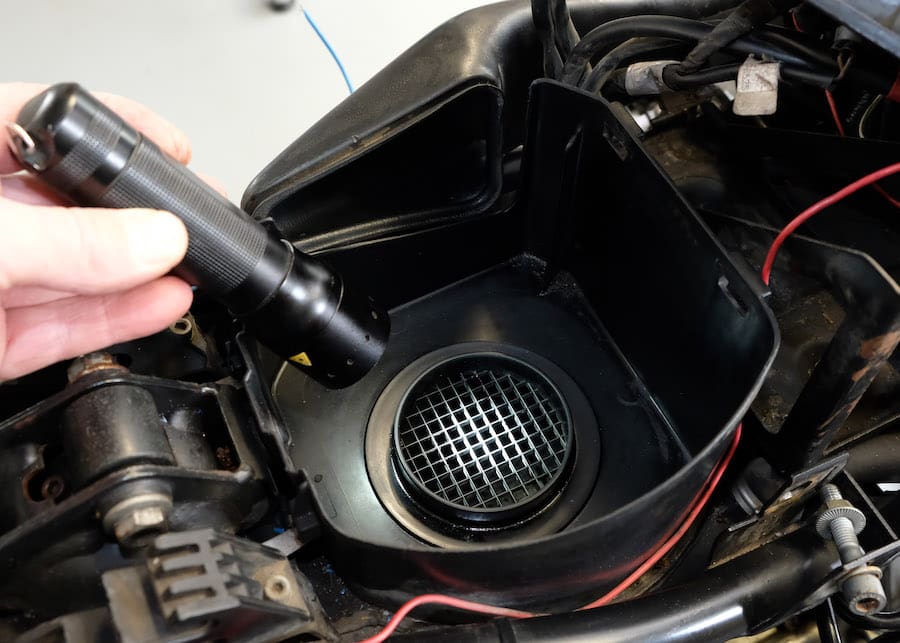
2 After taking the old filter out and cleaning the main air box housing we can see in the lower section that a lot of old oil and sludge has collected, making a thick slimy pool that needs cleaning.
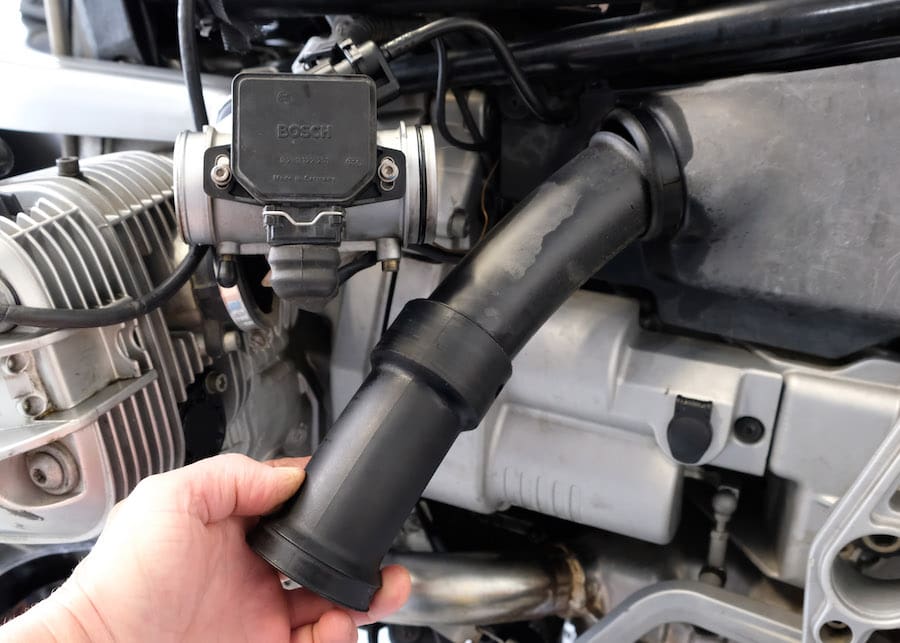
3 Even if we remove the entire airbox from the bike, it cannot be split open for cleaning so we are removing the flexible connectors to see if we can access the mess from either side.
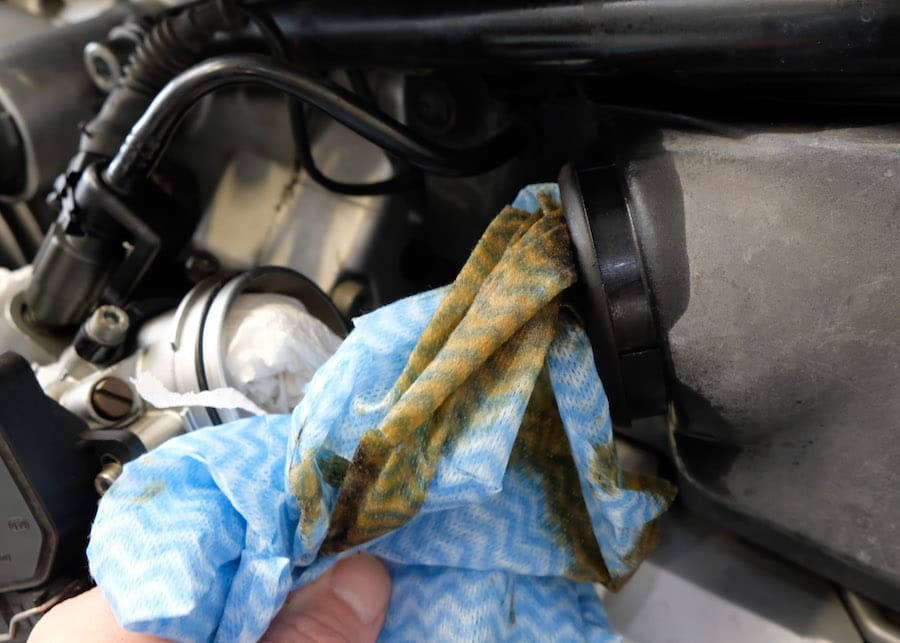
4 It is a long, tedious process but we seem to be getting it clean by using petrol infused rags that we are feeding in through the manifold connection and pushing around in there to soak it up.
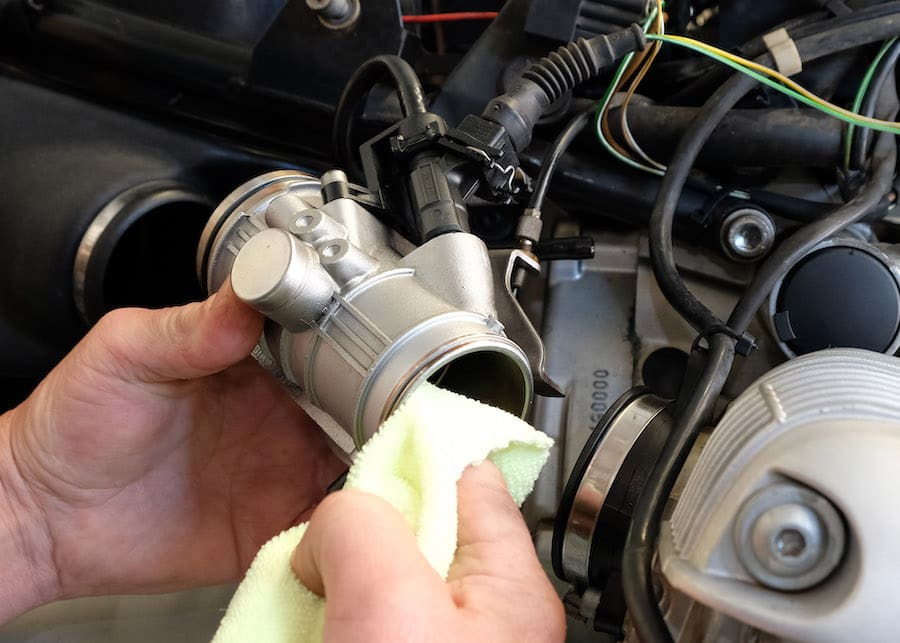
5 While we are at it, we have removed the throttle bodies to polish up the inlet and outlet passages, taking care not to contaminate the area with polish or bits of rag.
6 It is also worthwhile checking the operation of the throttle mechanisms and give them a clean and a light bit of lubrication while we have the throttle bodies off.
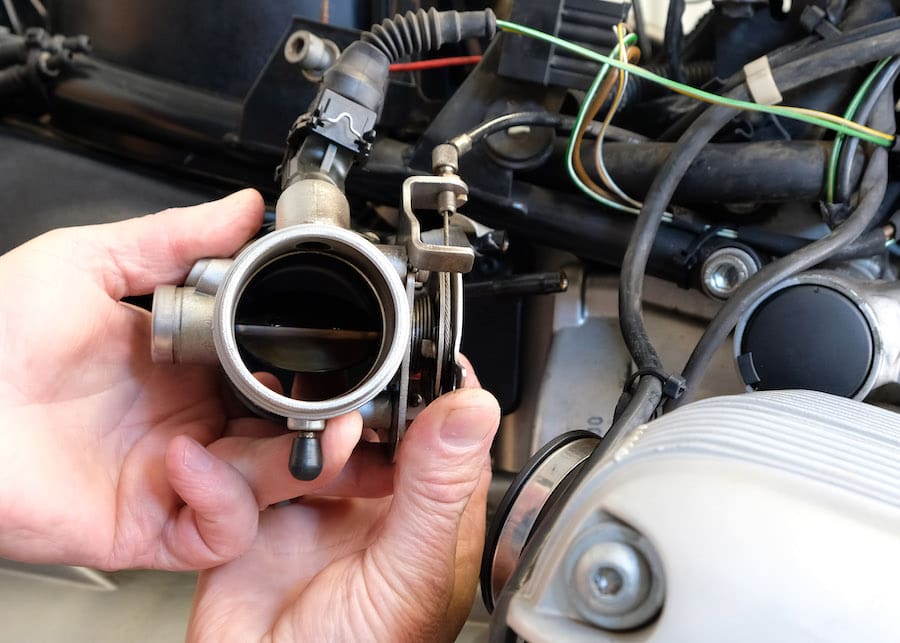
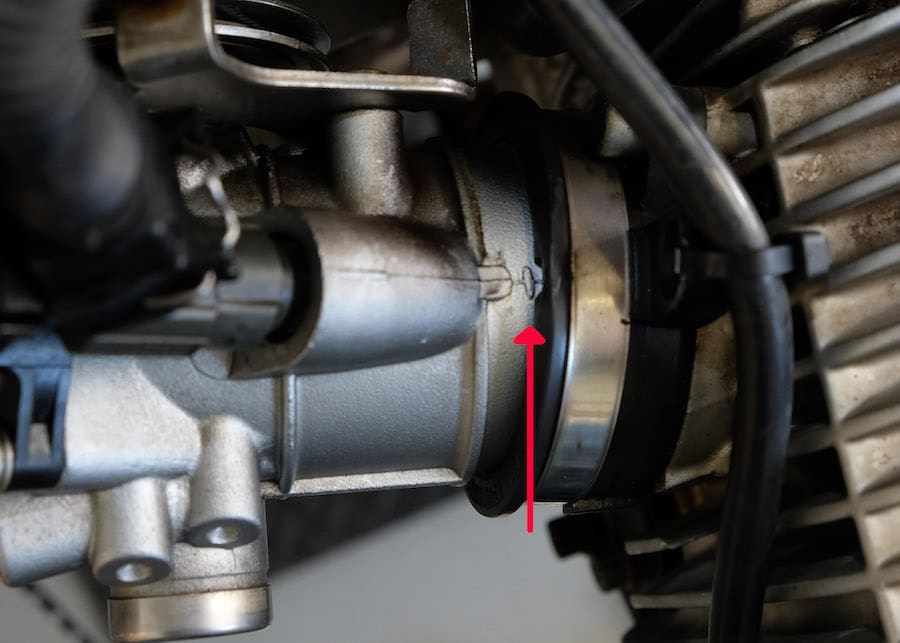
7 When refitting throttle bodies to the intake manifolds, look for alignment marks to make sure they are positioned correctly.
8 A spray of plastic cleaner and lubricant is always a good idea to help things slide into place more easily.
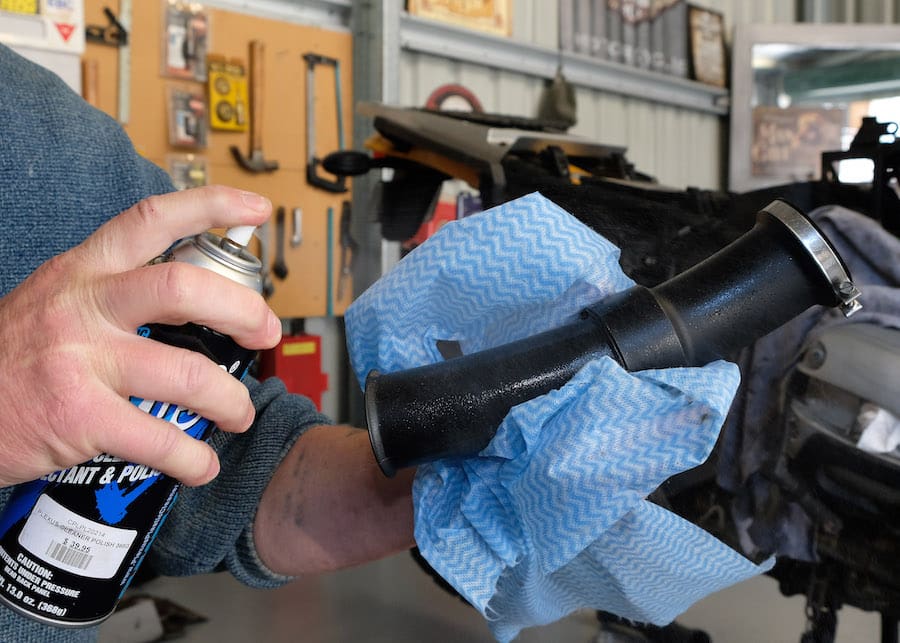
9 A smear of engine oil on O-rings before reassembly helps things seal up properly and can also prevent damage to the rubber O-ring during fitment.

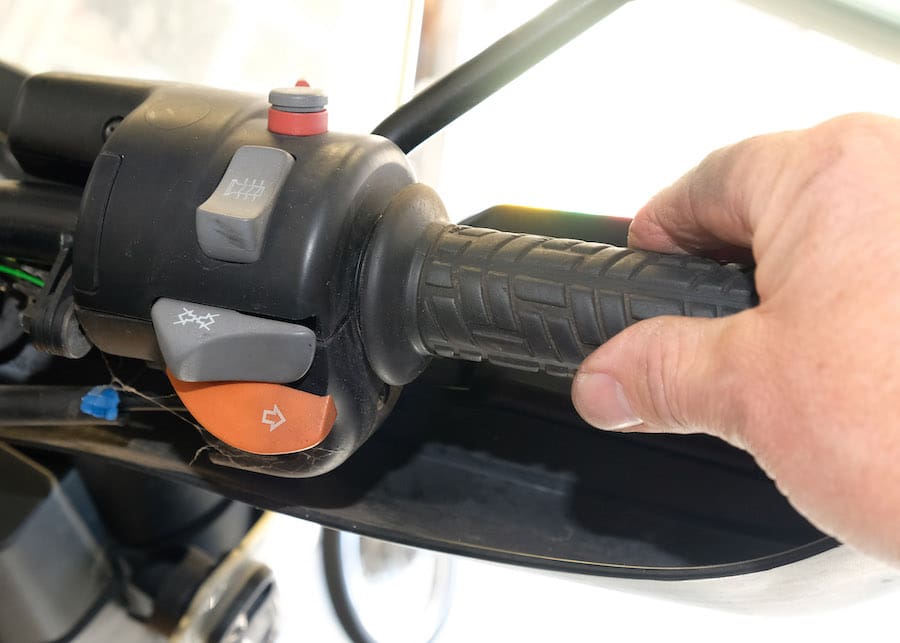
10 A quick check to make sure the throttle mechanism is moving cleanly and snapping back properly is always worthwhile after working on any part of the throttle assembly.
11 We will finish off by fitting a new air filter. Normally we would choose a good quality high-flow product, but while we are still unsure about this bike we will start cheap and change it later.
 Tip
Tip
 Tip
TipWhen we know what area of the bike we are going to work on next we generally go through and spray a little penetrating oil on all the fasteners a few hours or even a day before we start the work. It often avoids the frustration of stuck or stripped screws that then need to be replaced.