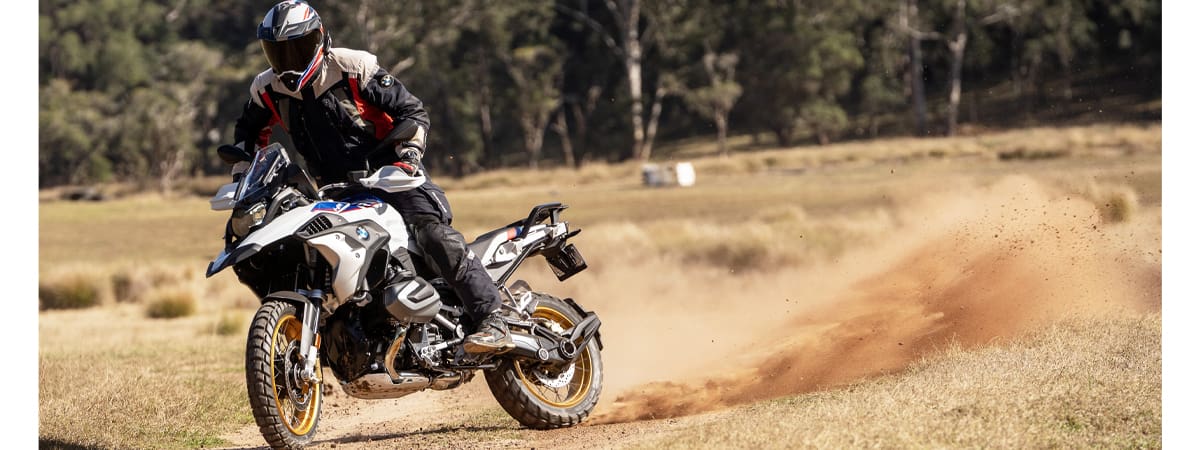
It might be the old Boy Scouts motto, but when it comes to adventure riding, especially when you’re heading well off the beaten track, it pays to be prepared.
Bike set-up, luggage load, tools, spare parts, camping kit, riding gear, route selection, communication devices, first-aid knowledge and dealing with an emergency are just the beginning of countless aspects that should be well considered before you set off on your adventure ride.
The more prepared you are, the more enjoyable your ride will be, and the better you will be able to deal with a crisis should things, heaven forbid, turn to crap.
-
Bike Set up
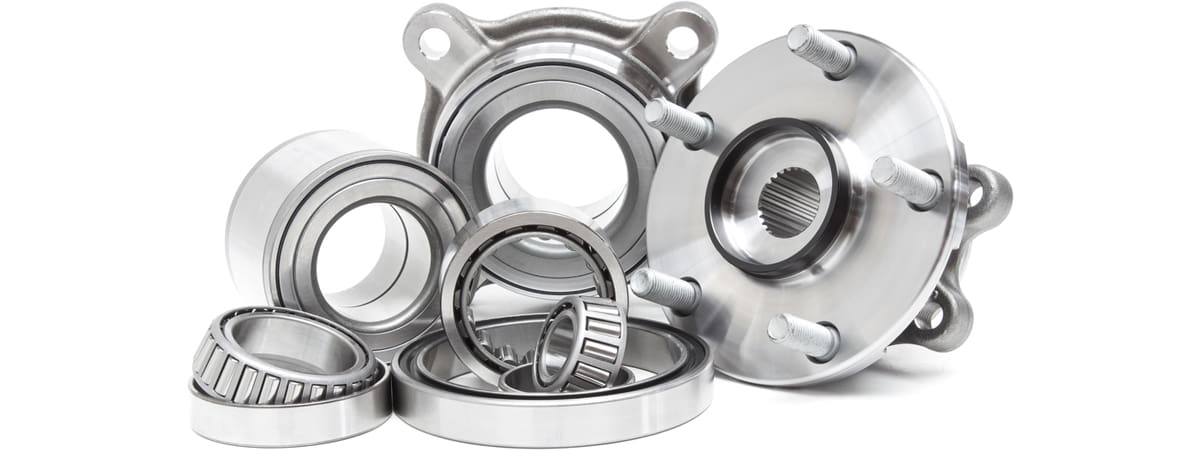
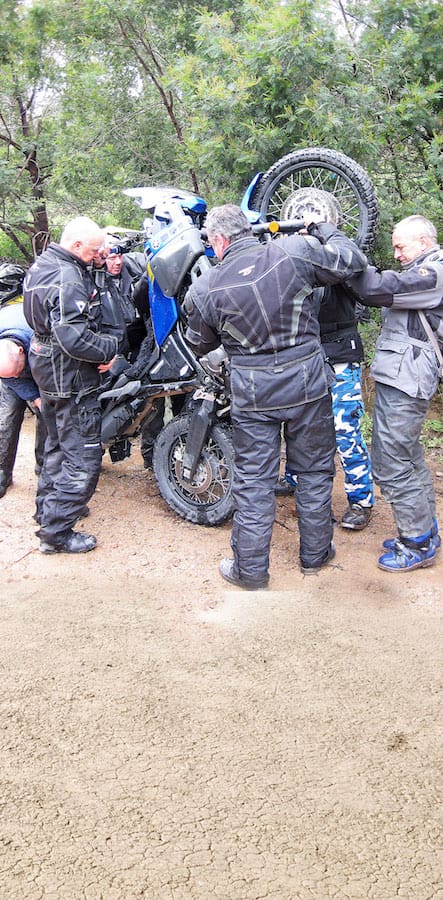
Nothing brings an adventure ride to a halt faster than a broken-down bike. So making sure your bike is prepped and ready is high on the list of pre-ride priorities. No matter whether you handle your own bike maintenance and set-up or get a workshop to do it, make sure the bike is gone over with a fine-tooth comb well ahead of your departure date.
Pre-ride preps should include engine oil and filter change, air filter servicing, and inspection of your bike’s tyres, chain and sprockets, brake pads, steering head, swingarm and wheel bearings, cables, levers, footpegs and all fasteners.
If you have to ask if any item will make it through the trip, replace it or service it – now.
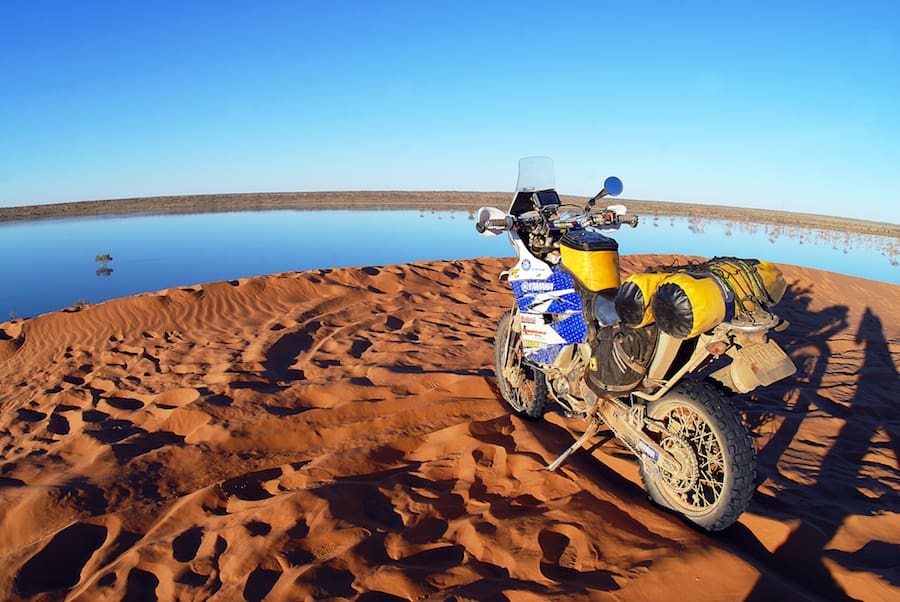
A huge part of ADV bike set-up is luggage-carrying capacity, and this is one aspect you really must have sorted.
Hard luggage might be convenient, but cases tend not to bounce very well in a crash, and all too often they can catch your feet or ankles in a tip-over.
As for top boxes, endless corrugations will soon reef them from their mounts.
So soft panniers and dry bags are becoming more popular, especially with off-road adventurers, and there’s a huge range of mounting frames and waterproof bags to choose from.
While it’s hard to do, try to pack as light as possible, and try to keep your load as low as possible on the bike. Make sure it is securely fastened – the old ‘ocky strap’ just won’t do it these days.
2. Good Gear
Way before Ewan and Charley brought adventure bike riding into the loungerooms of want-to-be adventurers, waxed-cotton jackets, denim jeans and desert boots were the riding gear of choice for two-wheeled global roamers.
Nowadays, there’s a bewildering array of riding gear specifically designed for adventure riding, constructed from waterproof and hard-wearing textile fabrics, boasting additional and removable layers, to make them suitable for a vast range of weather conditions.
Comfort, fit, features, protection and price are all factors that come into play when choosing riding gear, just don’t underestimate the importance of the gear’s protective qualities. Jackets should include protective armour in the shoulders, elbows, chest and back and, while most pants will have some form of knee protection, it is generally rather inadequate. Dedicated MX-style knee braces are a must to wear under your pants, as your knees are so vulnerable to both roost from passing bikes and impacts with the ground when you bin it – and, yes, you will bin it.
Specialist adventure or off-road boots are another must, as road-riding boots don’t offer enough protection or rigidity.
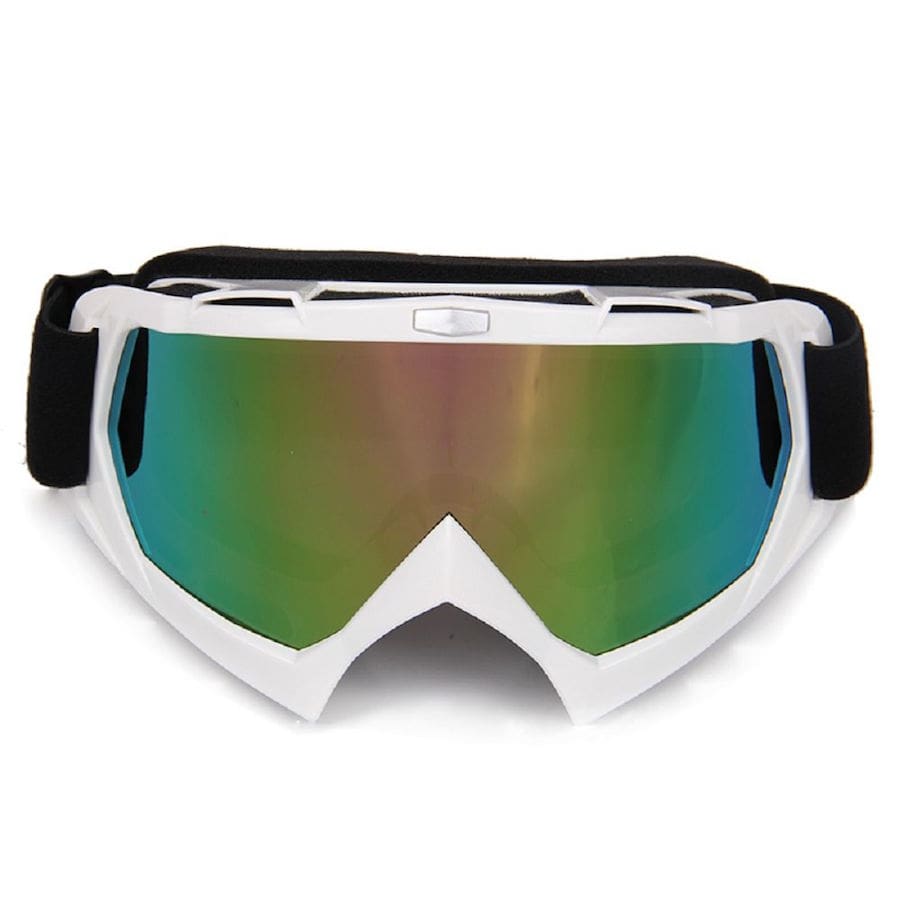
A specialist adventure helmet with peak and visor is another must, along with goggles, which are far better in dusty conditions than just a visor.
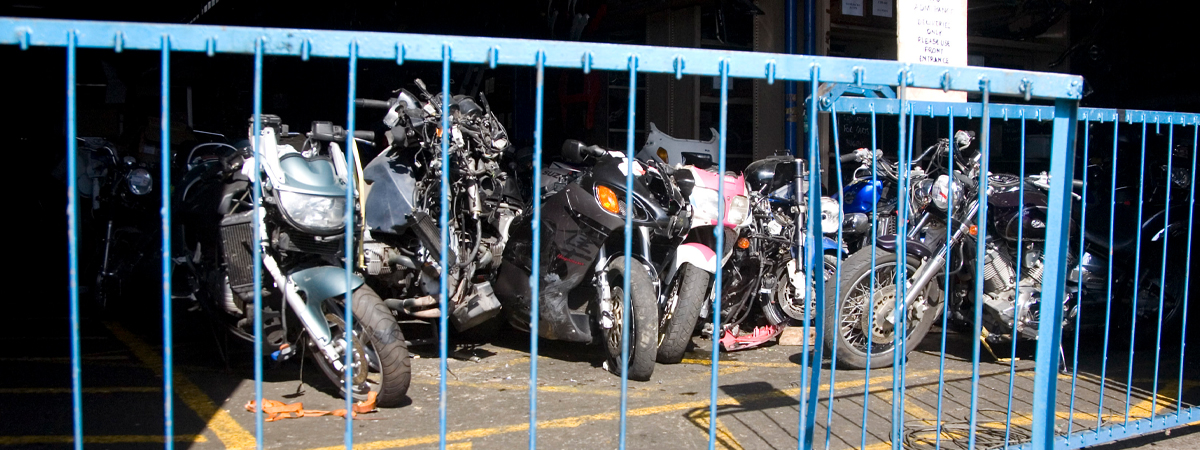
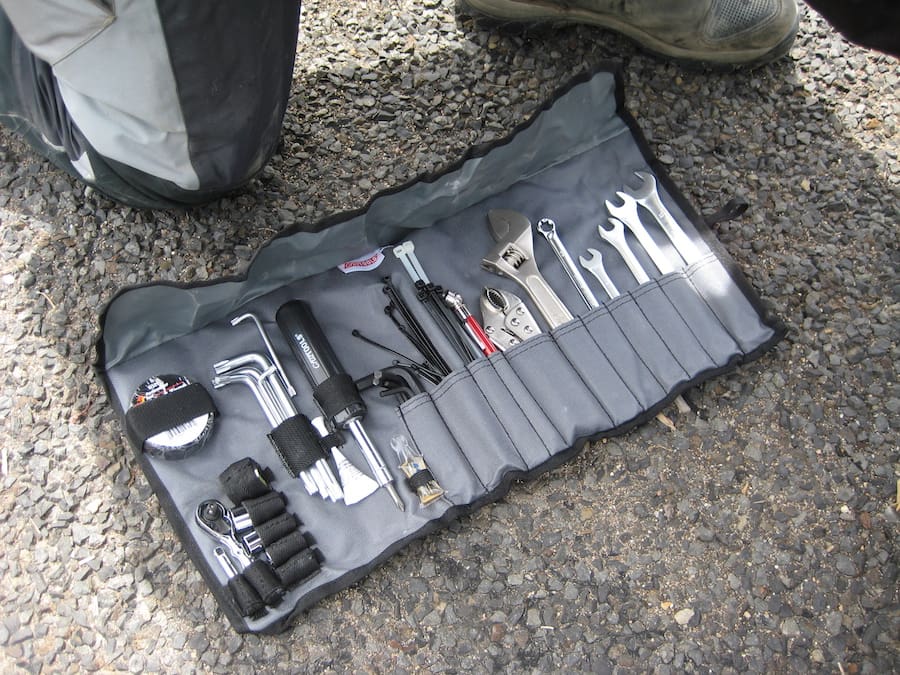
3. Tools and Spares
Most new bikes are supplied with hopelessly inadequate toolkits (if at all), so it’s up to you to assemble a stock of tools and spares to let you deal with typical trailside mechanical issues such as flat tyres, breakdowns or crash damage.
Aftermarket toolkits are a great place to start, and you can even get kits specific to your brand of bike complete with the correct fasteners it might use. Plus, they’ll come bundled up in a tool roll or a wearable bum bag.
The best way to compile a toolkit that’s going to be up to the job is to use it at home when working on your bike. Any time you need to reach for a different tool from your bench or toolbox, then it will need to go with you in your mobile toolkit.
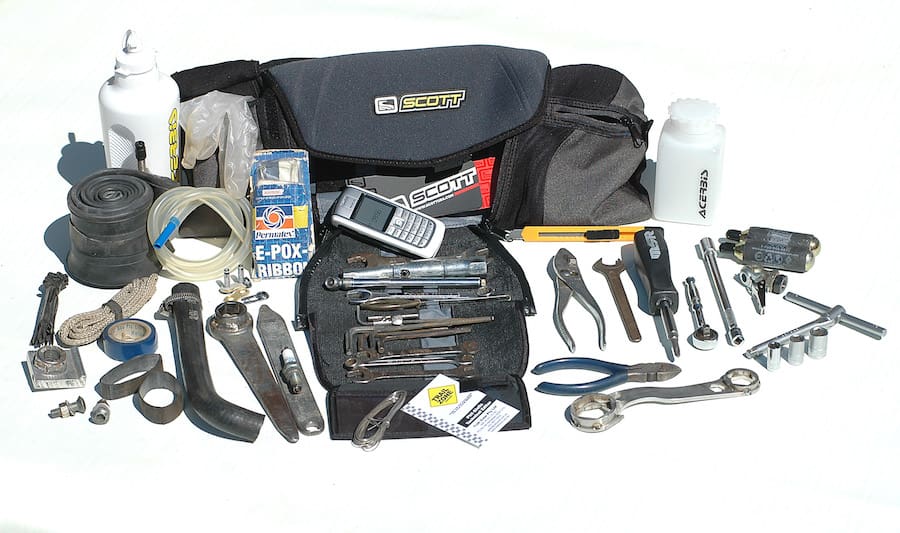
As for spares, tyre repair gear and spare tubes are a must, as is a pump or CO2 cartridges and/or mini-compressor for inflation.
A selection of spare nuts, bolts and fasteners is another must-have, along with items like duct tape, cable ties, hose clamps, wire, thread lock and metal putty. Consider carrying joining links, a short length of chain, a length of radiator hose, replacement levers and cables, a tow rope and even a fuel bladder if you’re facing long stints between servos.
If you know you’ll be chewing dust on your ride, carry a spare and oiled (if required) air filter element, or pre-filters to swap part way through.
Finally, pack a torch or head lamp, and a lighter to start a fire, just in case you’re stuck on the side of the road waiting for help for a while.
A survival kit with compact tarp, sleeping bag, food and water is also a must if you’re heading well off the beaten track and could get stuck overnight.
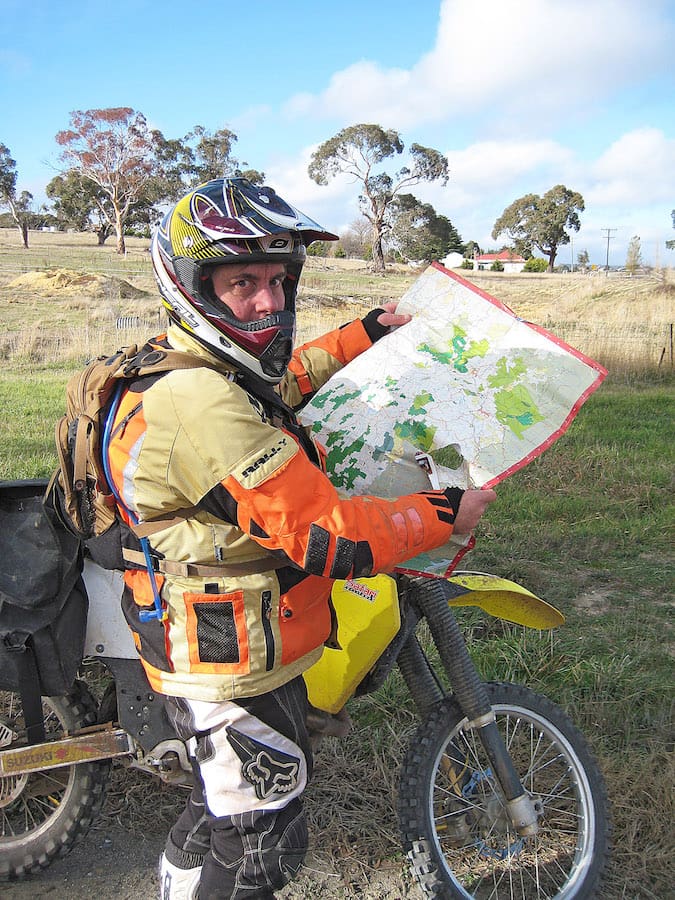
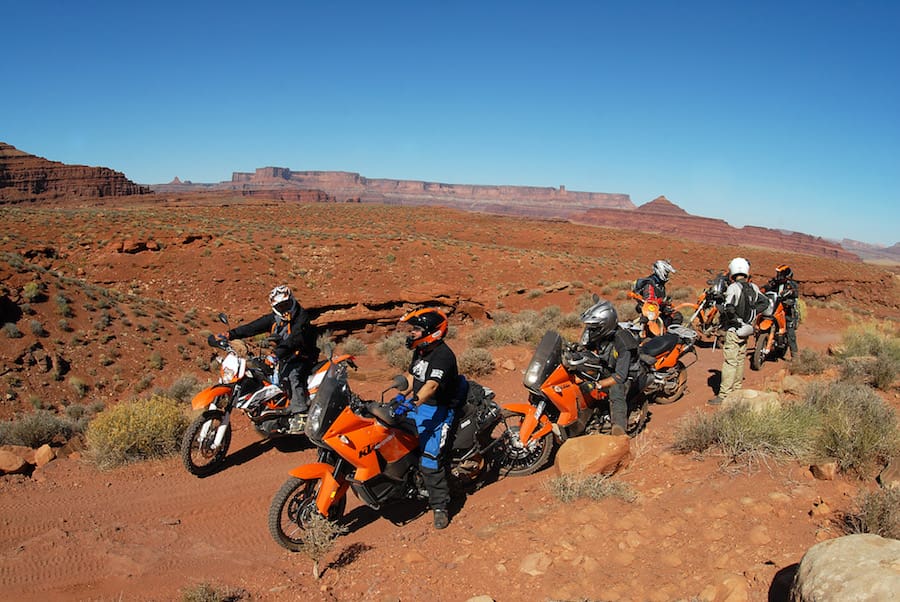
4. Plan Your Route
Pre-planning and plotting out a route is half the fun of any adventure ride, but only if you have a sense for navigation. If not, leave it to someone else in the group who does.
Online mapping software (like Basecamp) and apps (like Rever) can make plotting a route and loading it into a GPS or your mobile phone a doddle.
But take a tip from the wise – don’t always rely on roads and tracks you see on a screen as being open or accessible. Local land owners and users can soon bring the fun to halt in the form of a locked gate or fence. In moments like this when you have to re-route on the fly, or should your GPS simply give up the ghost (yes, it happens), back-up paper maps are worth their weight in gold. Never leave home without them.
When planning your route, consider the average daily distance you want to achieve, and then plan your stops with regard to fuel, food and accommodation availability. Also give consideration to bail-out routes should the weather turn sour and roads become impassable. Be aware some areas, such as the Victorian High Country and Simpson Desert, have seasonal closures prohibiting access.
Online forums are an awesome resource for route suggestions and road conditions, and when you’re on the road don’t be shy at asking the locals about what lies ahead.
And if you do get lost, don’t panic! Backtrack to your last known location and try again. If the fuel levels get low, you can transfer fuel to one or two bikes in the group to get them back to civilisation, before coming back with more fuel to get the rest.
If you do get stuck, just remember the golden rule: Stay with your vehicle!
5. Copy that
If you’re hoping to stay in touch on your ride, only count on mobile phones working in major population centres; after that, signal areas get patchy at best.
Download the free EmergencyPlus app to your mobile before you leave, as it makes the task of contacting emergency services from your mobile easier and greatly assists them in pin-pointing your location.
Satellite phones offer far greater coverage than mobiles and, while they have come down in price over recent years, they are still expensive to buy and continue to have high call costs. Sat-phone hire, however, is readily available, and the costs involved could be affordable when amortised over a group of riders.
While they don’t allow calls to be made, tracking devices such as the SPOT Tracker and Inreach brands do offer some peace of mind (and some offer text messaging outside of mobile phone service areas), by allowing others (wives/family/friends etc) to track your ride progress and know where you are, as well as being able to send a distress message to emergency services when activated.
A traditional Epirb or PLB is another option that can be carried and activated in an emergency to call for the cavalry.
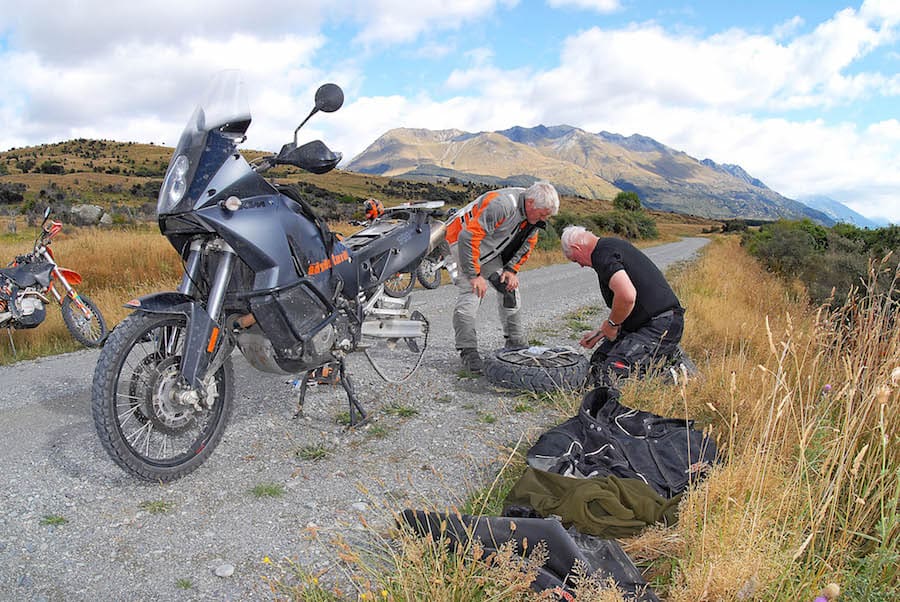
6. Flat Tyre
The most common mechanical problem on adventure rides are flat tyres, so you need to know how to deal with them to be able to get moving again with minimum aggravation.
If you’re running tubed tyres, use heavy-duty tubes and keep your tyre pressures higher to reduce the chance of pinch flats when heavily loaded bikes bottom out on dips, edges, logs and rocks. Carry spare tubes with you and simply swap out the punctured tube when you get a flat in order to get moving again as quickly as possible, then patch the flat tube at the next overnight stop.
Practice makes perfect with fixing flats, especially when it comes to getting hefty rear tyres off the rim, the tube changed and the tyre back on again. Doing your own tyre changes at home (rather than getting a workshop to do it) is the best way to familiarise yourself with this process. And having a centrestand is invaluable for making the job of getting a rear wheel out, and then back in, that much easier.
Tubeless tyres can be easier to repair when punctured, as the tyre can stay on the rim, so long as the puncture is from a nail or wire and the hole can be easily accessed with a tubeless repair kit and plug. Getting the bead back up on the rim can be an involved process, so make sure you have a good pump, a mini-compressor, or plenty of CO2 cartridges.
Beware that tubeless tyres can be too badly damaged for plugs to work, so it still pays to carry an inner tube ready to go inside the damaged tyre to get you mobile again.
7. Drowned and out
Drowning a bike in a water crossing is another common problem on adventure rides, and it can be a tricky one to deal with, especially on modern-day multi-cylinder machines with paper air-filter elements.
The golden rule is to avoid drowning a bike in the first place. That means, if a water crossing looks in any way sketchy, get off and walk it first. Check the depth and find the best line across, especially if the water’s flowing fast and the crossing is filled with rocks and/or holes – wet boots are a small price to pay.
If you’re still wary, there’s no shame in walking your bike across and having other riders spot you on the way, ready to catch you and your bike to keep you from going underwater.
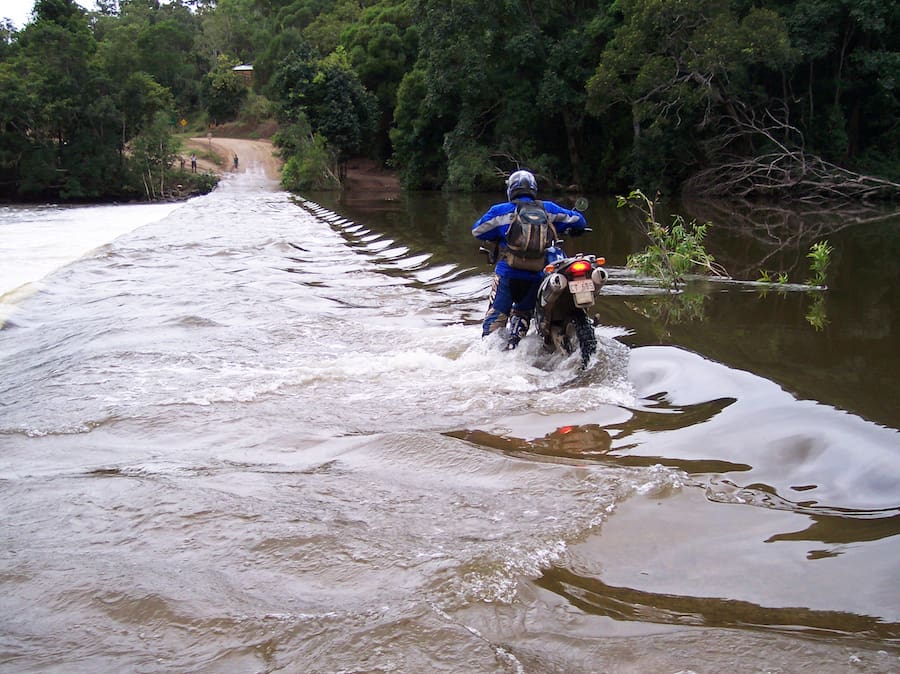
And never underestimate concrete causeways, as they can be as slippery as glass if covered in moss. They can bring you undone in an instant, and the landing will be hard.
If your bike does go under, kill the engine as quickly as you can and get the bike back up as soon as you can. Get it out to the other side and then start the involved process of dewatering the bike by getting the plug(s) out and getting any water out of the cylinders, out of the exhaust and out of the airbox and filter element. Chances are your engine oil will be polluted as well (it will look milky), so when you get to the next town with a servo, dump the engine oil, flush and refill.
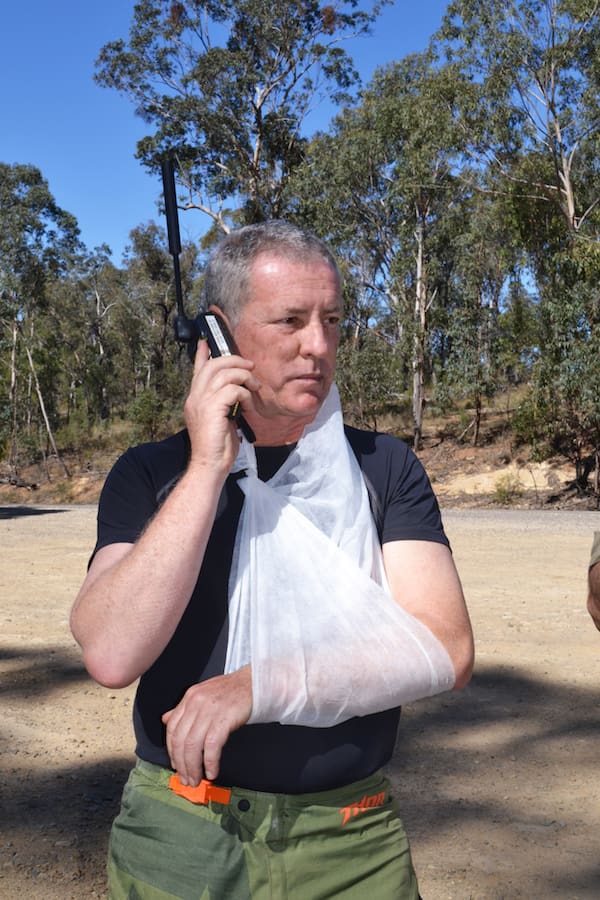
8. First Aid
Medical help can be a long way away on an adventure ride, so basic first-aid knowledge is essential. First-aid courses are readily available and you can even undertake specific motorcycle-oriented courses in some locations. A comprehensive first-aid kit must be part of the gear every group or solo adventurer carries.
Injuries can vary greatly, of course, but the first processes to follow apply at the scene of any accident: Control the accident scene and warn other road users of the danger, and stabilise the injured rider.
Once the extent of injuries are determined – and don’t always take the rider’s comments as the only form of diagnosis, as pride often gets in the way, or they could be suffering internal injuries or shock – and the decision is made to call for the cavalry, then get onto it, be it via a mobile phone, sat-phone, tracking device or EPIRB. If none of this is available, send another rider for help, preferably two.
If you don’t have ambulance cover, get it. The cost of ambulance extraction from remote areas can be huge, and certainly will be if emergency services despatch a rescue helicopter.
While you’re at it, consider having the highest level of roadside assistance coverage for your motorcycle, not to mention insurance, as bike recovery costs can also be massive.

9. The hot, the dry and the cold
Appropriate riding gear is key to avoiding hypothermia in extremely cold conditions. Thermals, mid-layers and even heated riding gear will go a long way to beating the cold. You might look like the Michelin Man, but if that’s what it takes to stay warm, just do it.
Wet-weather gear is an obvious must-have, and you will be amazed just how well good-quality gear works, especially gloves, as your extremities are enormously susceptible to the cold; needless to say, heated grips can work wonders.
Overcoming hypothermia is a slow and calculated process. Get the person out of the cold and out of wet clothing, cover them with blankets and insulate their body, then provide warm beverages and gradually bring their core temperature back up to normal.
Hyperthermia is the opposite situation, where the body becomes overheated by absorbing more heat than it can dissipate, and can readily occur during prolonged riding in the heat. Like hypothermia, it can be extremely serious if not dealt with. Stop riding, move to a cooler, shaded place, remove riding gear to promote airflow over the body, sip cool water or an electrolyte drink, place a cool, wet cloth on the forehead, and lie down and rest.
Dehydration can also be debilitating, but it’s easily avoided by taking on small and regular fluids as you ride. In hot conditions where you are working hard riding the bike, dehydration can fast overcome you. Hot and yellow urine is often the first sign of dehydration, along with light-headedness and a general feeling of weakness. So keep your fluid intake up and keep your urine cool and clear – this will indicate you have your hydration levels in check.
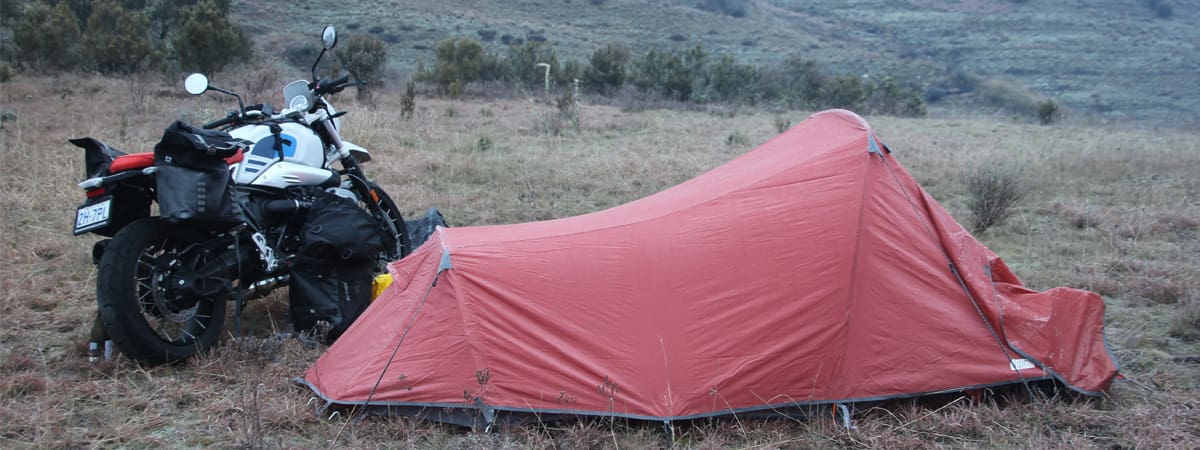
10. Pitch a tent
Camping adds a whole different dimension to adventure bike riding and will be the only way to go for those who truly want to get away from it all and leave the luxuries of civilisation behind.
Camping from your bike means carrying everything you need and, while in the early days hardy adventurers hit the road with everything but the kitchen sink strapped to the back of their machine, these days the camping kit has become way more compact and convenient.
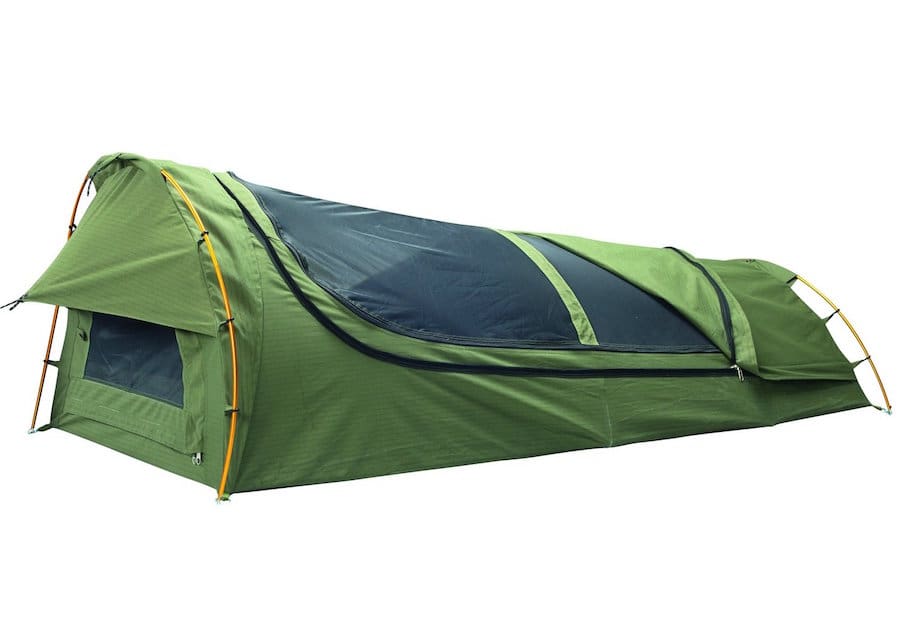
Sleeping in a swag or tent is the first decision you need to make. Swags can be warmer but bulkier to carry; tents can give more protection of your gear. Whichever you choose, keep it compact. The same goes for cooking gear and camp chair – and you will want a chair for kicking back in front of a campfire.
Choosing where to camp also comes down to personal preference. Some riders want the full bush experience where the emphasis is on being entirely self-sufficient – just beware you don’t set-up camp on private property and earn the wrath of an irate land owner – others are happy to camp within walking distance of a pub, or at a caravan park just around the corner from the local RSL. The choice is yours.
Just remember when selecting a camp site not to roll out your swag where flood waters might rise, or where something might fall on you – that includes your bike! – or in a direct line between your mate’s tent and the can.
Once you get a few motorcycle camping expeditions under your belt, you will soon learn what gear works and what doesn’t, and what you do need and don’t need to take with you. Happy trails!
Words & Photography Andrew Clubb